Suchen Sie etwas anderes?
Table of Contents
Scenario Details
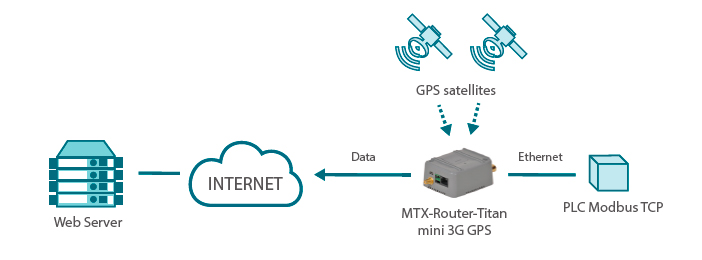
Some router models from the Titan family have internal GPS. That means that on top of the usual 3G router tasks (provide Internet connectivity to connected devices), it is also possible to perform additional tasks with the GPS location.
The MTX-Router-Titan-mini-3G-GPS is connected to a PLC via ethernet (or RS232/485). Said PLC uses the Titan router to get Internet connectivity, since it needs to send data to a remote server. Also, the PLC needs to get the Titan router GPS location and time. The PLC should be able to communicate with the Titan router via Modbus TCP in order to get that information.
Router Titan Configuration to Provide Internet Connectivity
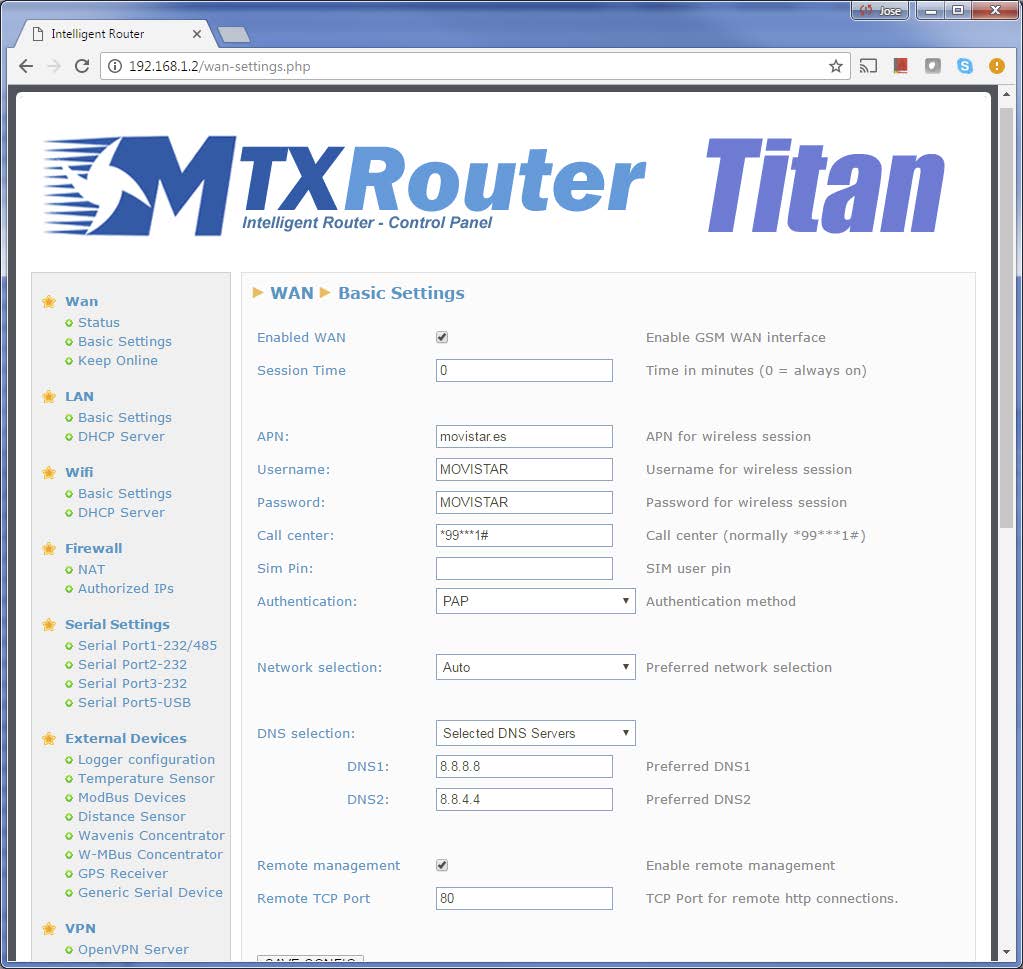
The configuration of the Titan router is pretty simple. First, we need to configure the section “WAN > Basic Settings,” configuring the APN, username and password according the SIM card used. This configuration will allow the Titan router to connect to the Internet.
Router Titan Configuration to Activate the Internal GPS
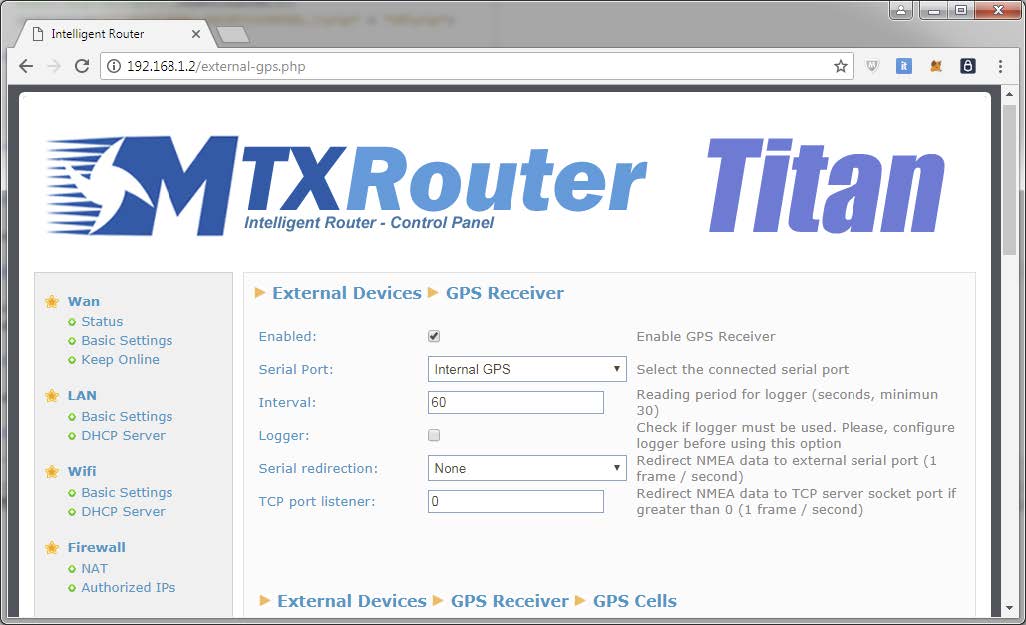
Next we will activate the GPS of the Titan router. We do that in the section “External Devices > GPS Receiver,” where we will activate the “Enabled” box and select the “Internal GPS” option from the “Serial Port” drop-down menu, as shown in the next screenshot:
Router Titan Configuration so It Behaves as a Modbus TCP Slave
To configure the Titan router as a Modbus TCP slave device we need to configure the section “Other > Modbus Slave,” where we will activate the “Enabled” box and select the standard port for Modbus TCP, which is the port number 502.

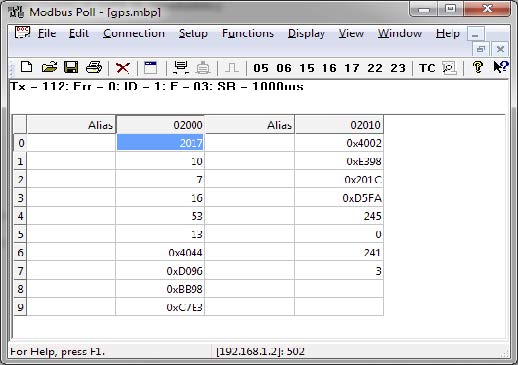
Notice the modbus registries related to the GPS data in the bottom of the previous screen.
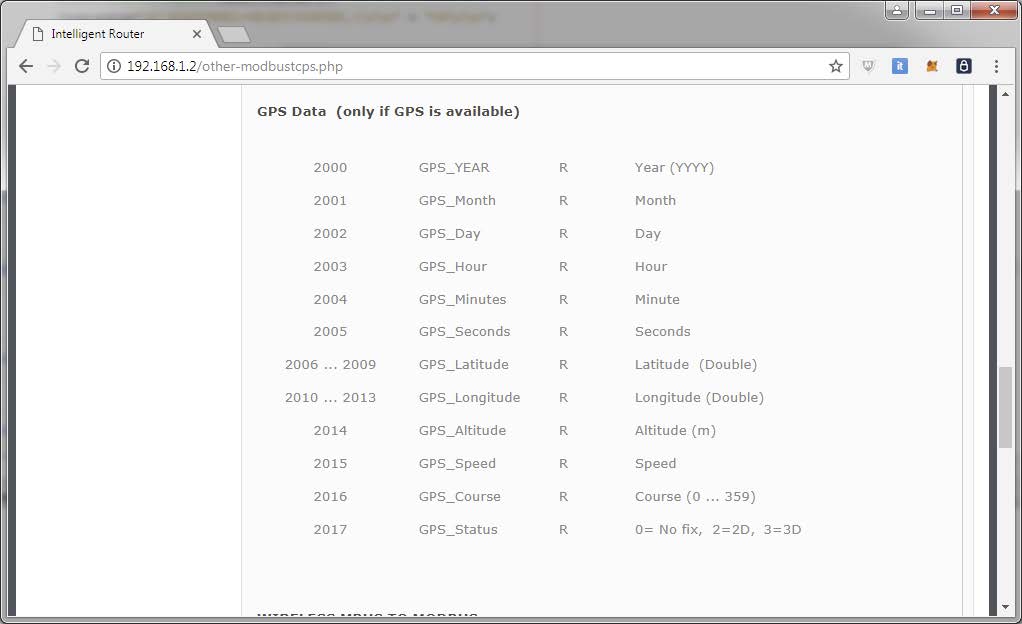
After restarting the router, we will be able to read the location data via modbus. Notice how the latitude and longitude are DOUBLE type data (8 bytes).
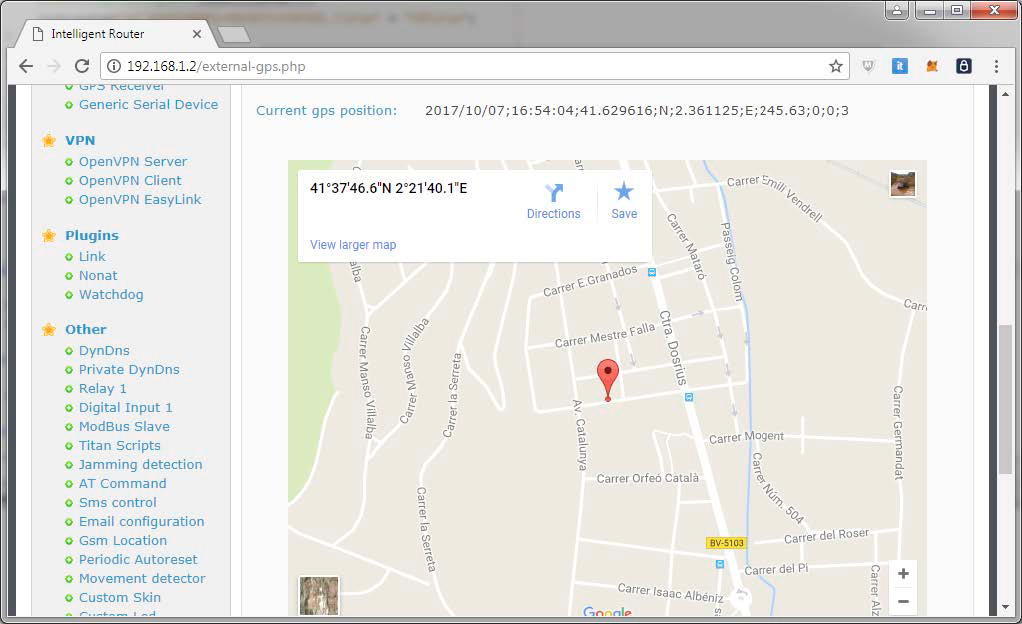
We can also get the graphic location in the section “External Devices > GPS Receiver.”
 Les accès par défaut sont :
 Saisir le mode de connexion « Ethernet » ou « modem » :
 Dans le cas d’une configuration par Ethernet, veiller à ce que les paramètres IP soient compatibles avec l’accès au serveur d’après la configuration du réseau local du concentrateur. Dans le cas d’une connexion par Ethernet, la configuration doit être compatible avec la topologie du réseau local du concentrateur afin qu’il puisse accéder aux serveurs. Cette configuration se fait via la page de configuration « Networks » (voir chapitre 3.2.2.3 : « Réseaux (Networks) »).
Dans le cas d’une connexion par modem, la configuration du modem doit être correcte avant de pouvoir effectuer une connexion. Cette configuration se fait dans la page de configuration « Modem » (voir chapitre 3.2.2.4 : « Modem »).
Les paramètres des serveurs à configurer au minimum sont les suivants :
Dans le cas d’une configuration par Ethernet, veiller à ce que les paramètres IP soient compatibles avec l’accès au serveur d’après la configuration du réseau local du concentrateur. Dans le cas d’une connexion par Ethernet, la configuration doit être compatible avec la topologie du réseau local du concentrateur afin qu’il puisse accéder aux serveurs. Cette configuration se fait via la page de configuration « Networks » (voir chapitre 3.2.2.3 : « Réseaux (Networks) »).
Dans le cas d’une connexion par modem, la configuration du modem doit être correcte avant de pouvoir effectuer une connexion. Cette configuration se fait dans la page de configuration « Modem » (voir chapitre 3.2.2.4 : « Modem »).
Les paramètres des serveurs à configurer au minimum sont les suivants :
 Il faut donc configurer les champs : « Interface », « Type », « Server type », « Address », « Port », « Login » et « Password ».
Les autres champs peuvent être laissés aux valeurs par défaut à condition que les répertoires aient été créés correctement auparavant. Voir chapitre 3.1.2 : « Fichiers de configuration » pour plus de détails.
Il faut donc configurer les champs : « Interface », « Type », « Server type », « Address », « Port », « Login » et « Password ».
Les autres champs peuvent être laissés aux valeurs par défaut à condition que les répertoires aient été créés correctement auparavant. Voir chapitre 3.1.2 : « Fichiers de configuration » pour plus de détails.


 Attendre. Le concentrateur va redémarrer avec sa configuration usine.


