Aller au contenu principal
Suchen Sie etwas anderes?
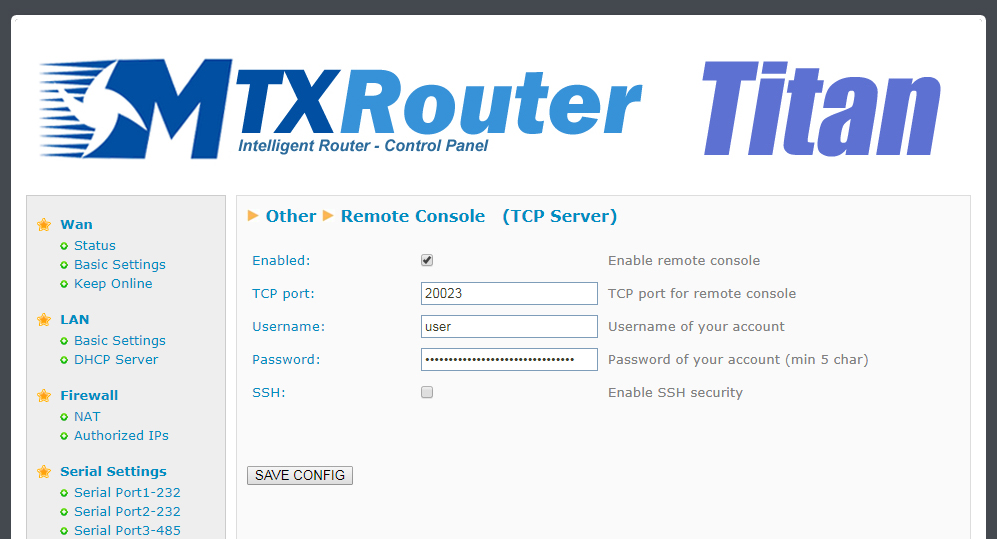
If at any time we need to carry out a special operation on the router via a Telnet-type connection, we can do so using this section. With this special connection we can send an SMS, change the router’s configuration, change a relay, etc. by sending AT commands via a Telnet-type connection.
- Enabled: activate this option if we want to use this special connection
- TCP Port: router’s listening TCP port where the connection should be made
- Login: username that will be required after a connection is made
- Password: password that will be required after a connection is made
- SSH: activate this box if we want to use SSH instead of Telnet
ADDITIONAL NOTES
- Once the configuration is finished, click “SAVE CONFIG” to save the changes. Remember that the router should be restarted for the changes to take effect. In case we activate/deactivate the SSH box, let’s make sure we also re-enter the password
- The remote access to the console can be carried out on a local level (Ethernet or WiFi) or remotely via a 2G/3G connection
Remote console (TCP Client)
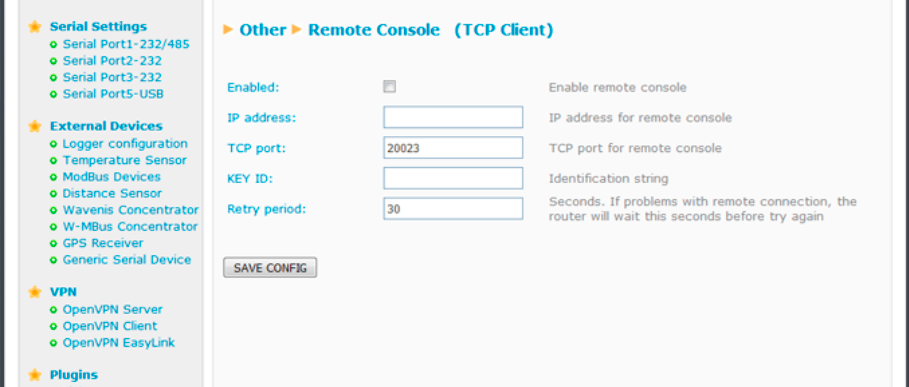
If we ever need to perform any special operations on the router through a “Telnet-like” connection, we can do so by configuring this section. That is, with this special connection we can, by sending AT commands through a telnet connection, send an SMS, make a change of router configuration, switch a relay, etc.
- Enabled: check this box if we want to use the remote console in TCP Client mode
- IP address: Remote IP address to which the Titan router will be connected.
- TCP Port: The remote TCP port to which the Titan router will connect.
- KEY ID: identifying text. The first will send the router through the socket.
- Retry period: Seconds. In case of socket drop, it allows to indicate the time to start a new connection attempt
ADDITIONAL NOTES
- Once the configuration is finished press the “SAVE CONFIG” button to save the changes. Remember to restart our router for the new changes to take effect.
- The AT commands sent in “TCP Client” mode, for reasons of compatibility, must be encapsulated between the
<MTXTUNNELR> </ MTXTUNNELR>tags. For example, to get the time:
<MTXTUNNELR> AT ^ MTXTUNNEL = GETTIME </MTXTUNNELR>
 Les accès par défaut sont :
 Saisir le mode de connexion « Ethernet » ou « modem » :
 Dans le cas d’une configuration par Ethernet, veiller à ce que les paramètres IP soient compatibles avec l’accès au serveur d’après la configuration du réseau local du concentrateur. Dans le cas d’une connexion par Ethernet, la configuration doit être compatible avec la topologie du réseau local du concentrateur afin qu’il puisse accéder aux serveurs. Cette configuration se fait via la page de configuration « Networks » (voir chapitre 3.2.2.3 : « Réseaux (Networks) »).
Dans le cas d’une connexion par modem, la configuration du modem doit être correcte avant de pouvoir effectuer une connexion. Cette configuration se fait dans la page de configuration « Modem » (voir chapitre 3.2.2.4 : « Modem »).
Les paramètres des serveurs à configurer au minimum sont les suivants :
Dans le cas d’une configuration par Ethernet, veiller à ce que les paramètres IP soient compatibles avec l’accès au serveur d’après la configuration du réseau local du concentrateur. Dans le cas d’une connexion par Ethernet, la configuration doit être compatible avec la topologie du réseau local du concentrateur afin qu’il puisse accéder aux serveurs. Cette configuration se fait via la page de configuration « Networks » (voir chapitre 3.2.2.3 : « Réseaux (Networks) »).
Dans le cas d’une connexion par modem, la configuration du modem doit être correcte avant de pouvoir effectuer une connexion. Cette configuration se fait dans la page de configuration « Modem » (voir chapitre 3.2.2.4 : « Modem »).
Les paramètres des serveurs à configurer au minimum sont les suivants :
 Il faut donc configurer les champs : « Interface », « Type », « Server type », « Address », « Port », « Login » et « Password ».
Les autres champs peuvent être laissés aux valeurs par défaut à condition que les répertoires aient été créés correctement auparavant. Voir chapitre 3.1.2 : « Fichiers de configuration » pour plus de détails.
Il faut donc configurer les champs : « Interface », « Type », « Server type », « Address », « Port », « Login » et « Password ».
Les autres champs peuvent être laissés aux valeurs par défaut à condition que les répertoires aient été créés correctement auparavant. Voir chapitre 3.1.2 : « Fichiers de configuration » pour plus de détails.


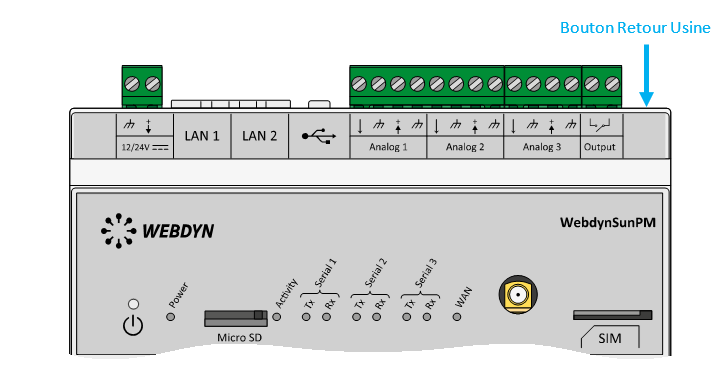 Attendre. Le concentrateur va redémarrer avec sa configuration usine.


