Zum Hauptinhalt springen
Suchen Sie etwas anderes?
Table of Contents
Introduction

This application note will explain how to configure the MTX-Router-EOS in order to perform a client – server configuration using OpenVPN and shared key.
It is not part of this application note how to configure the network interfaces of the computers, nor windows firewall options and so on.
OpenVPN server configuration
From the VPN -OpenVPN menu, we are going to configure the server options:
- We enable the OpenVPN server.
- The router itself generates an automatic key that we can use to establish the connection.
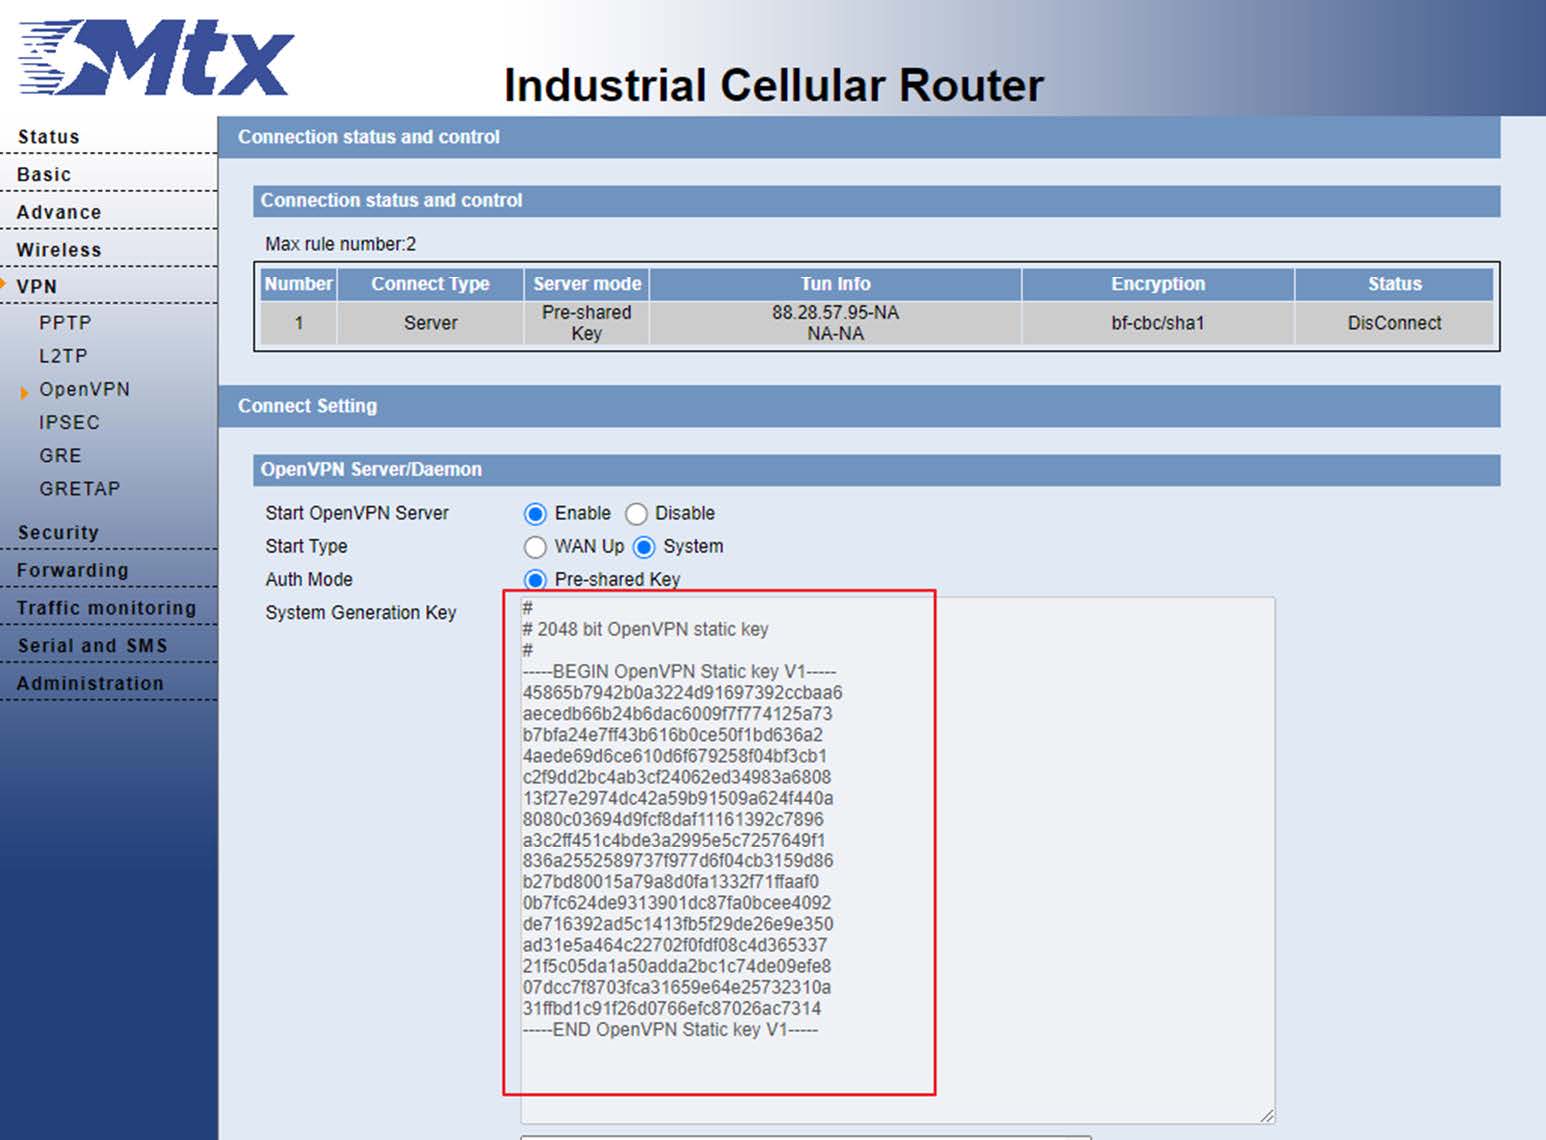
- We will copy this key and paste it in the Pre-shared Key section.
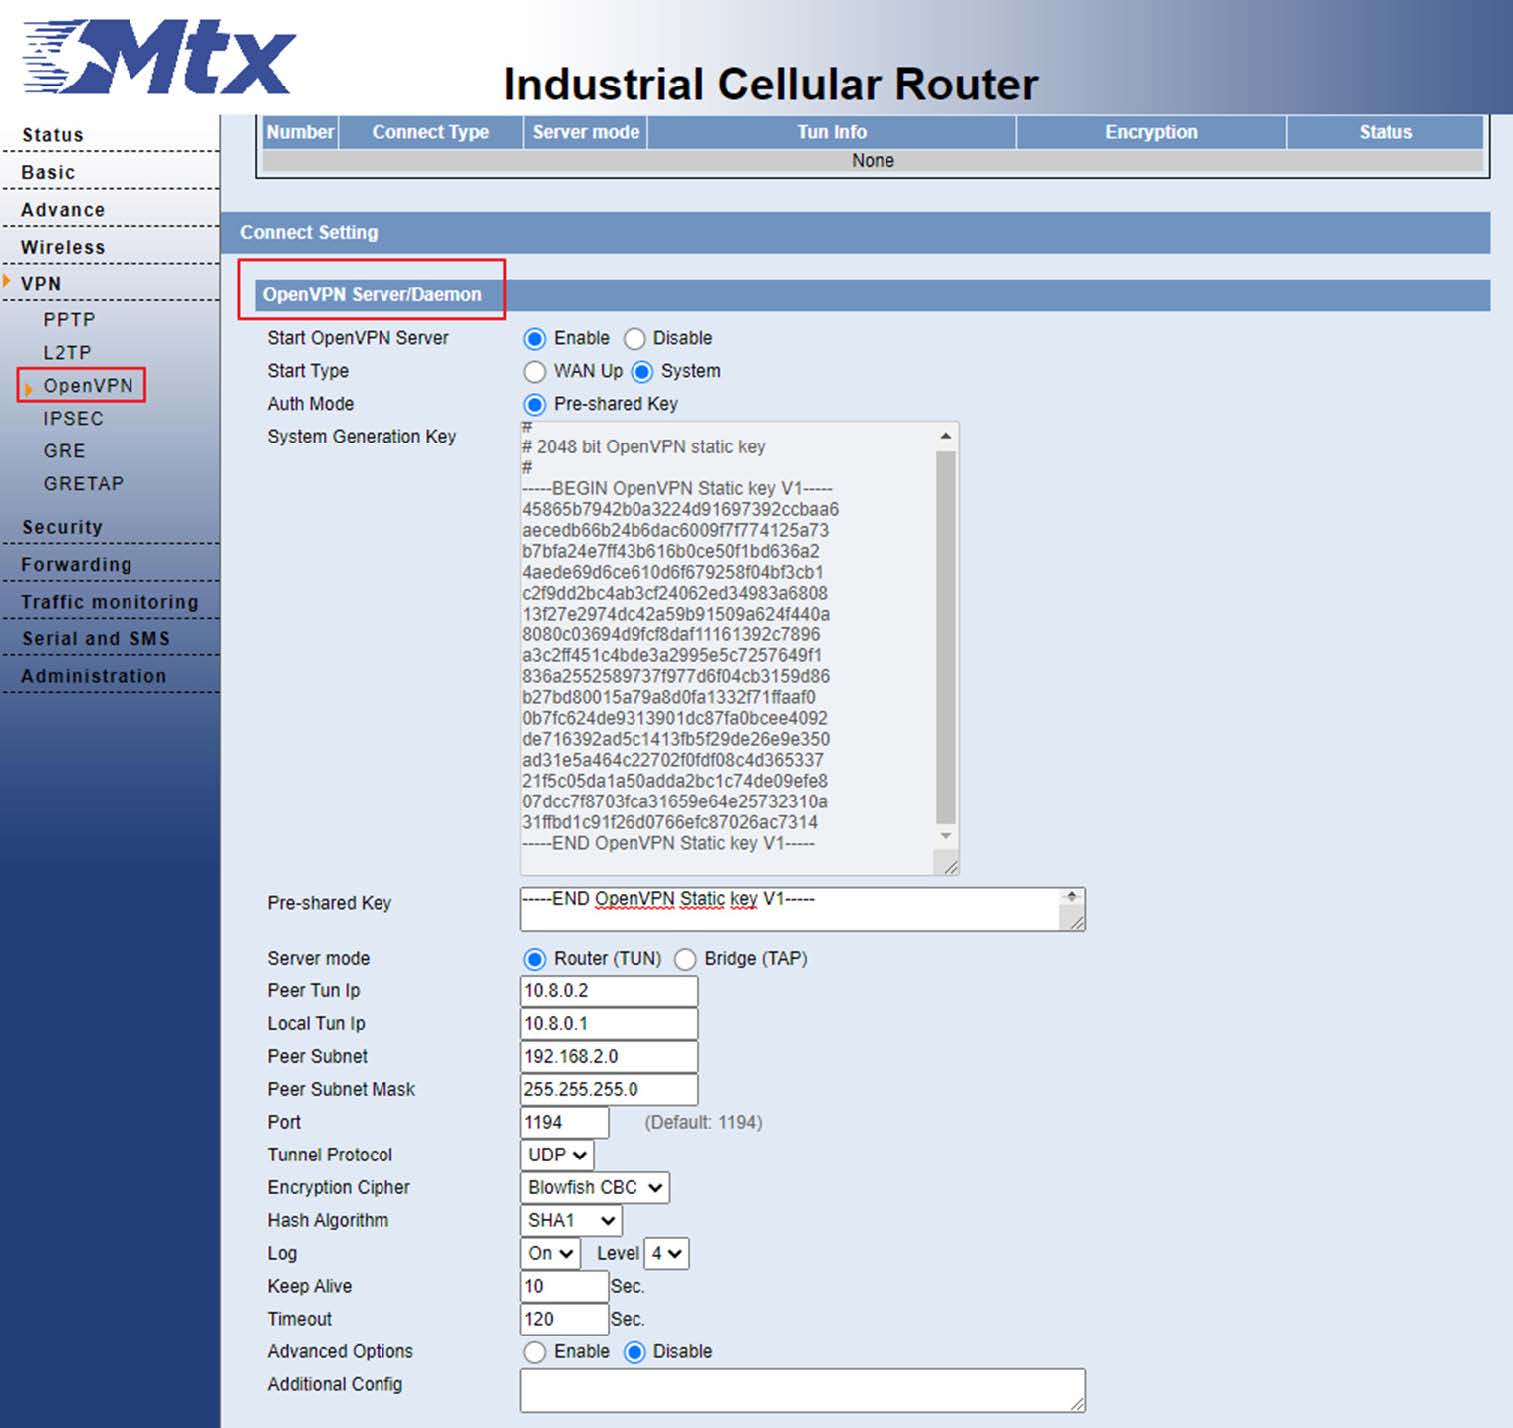
- Next, we will configure the Peer Subnet, which is the local subnet that the MTX-Router EOS client will have, in our case 192.168.2.0/24
- Finally we will apply the changes and save.
OpenVPN client configuration
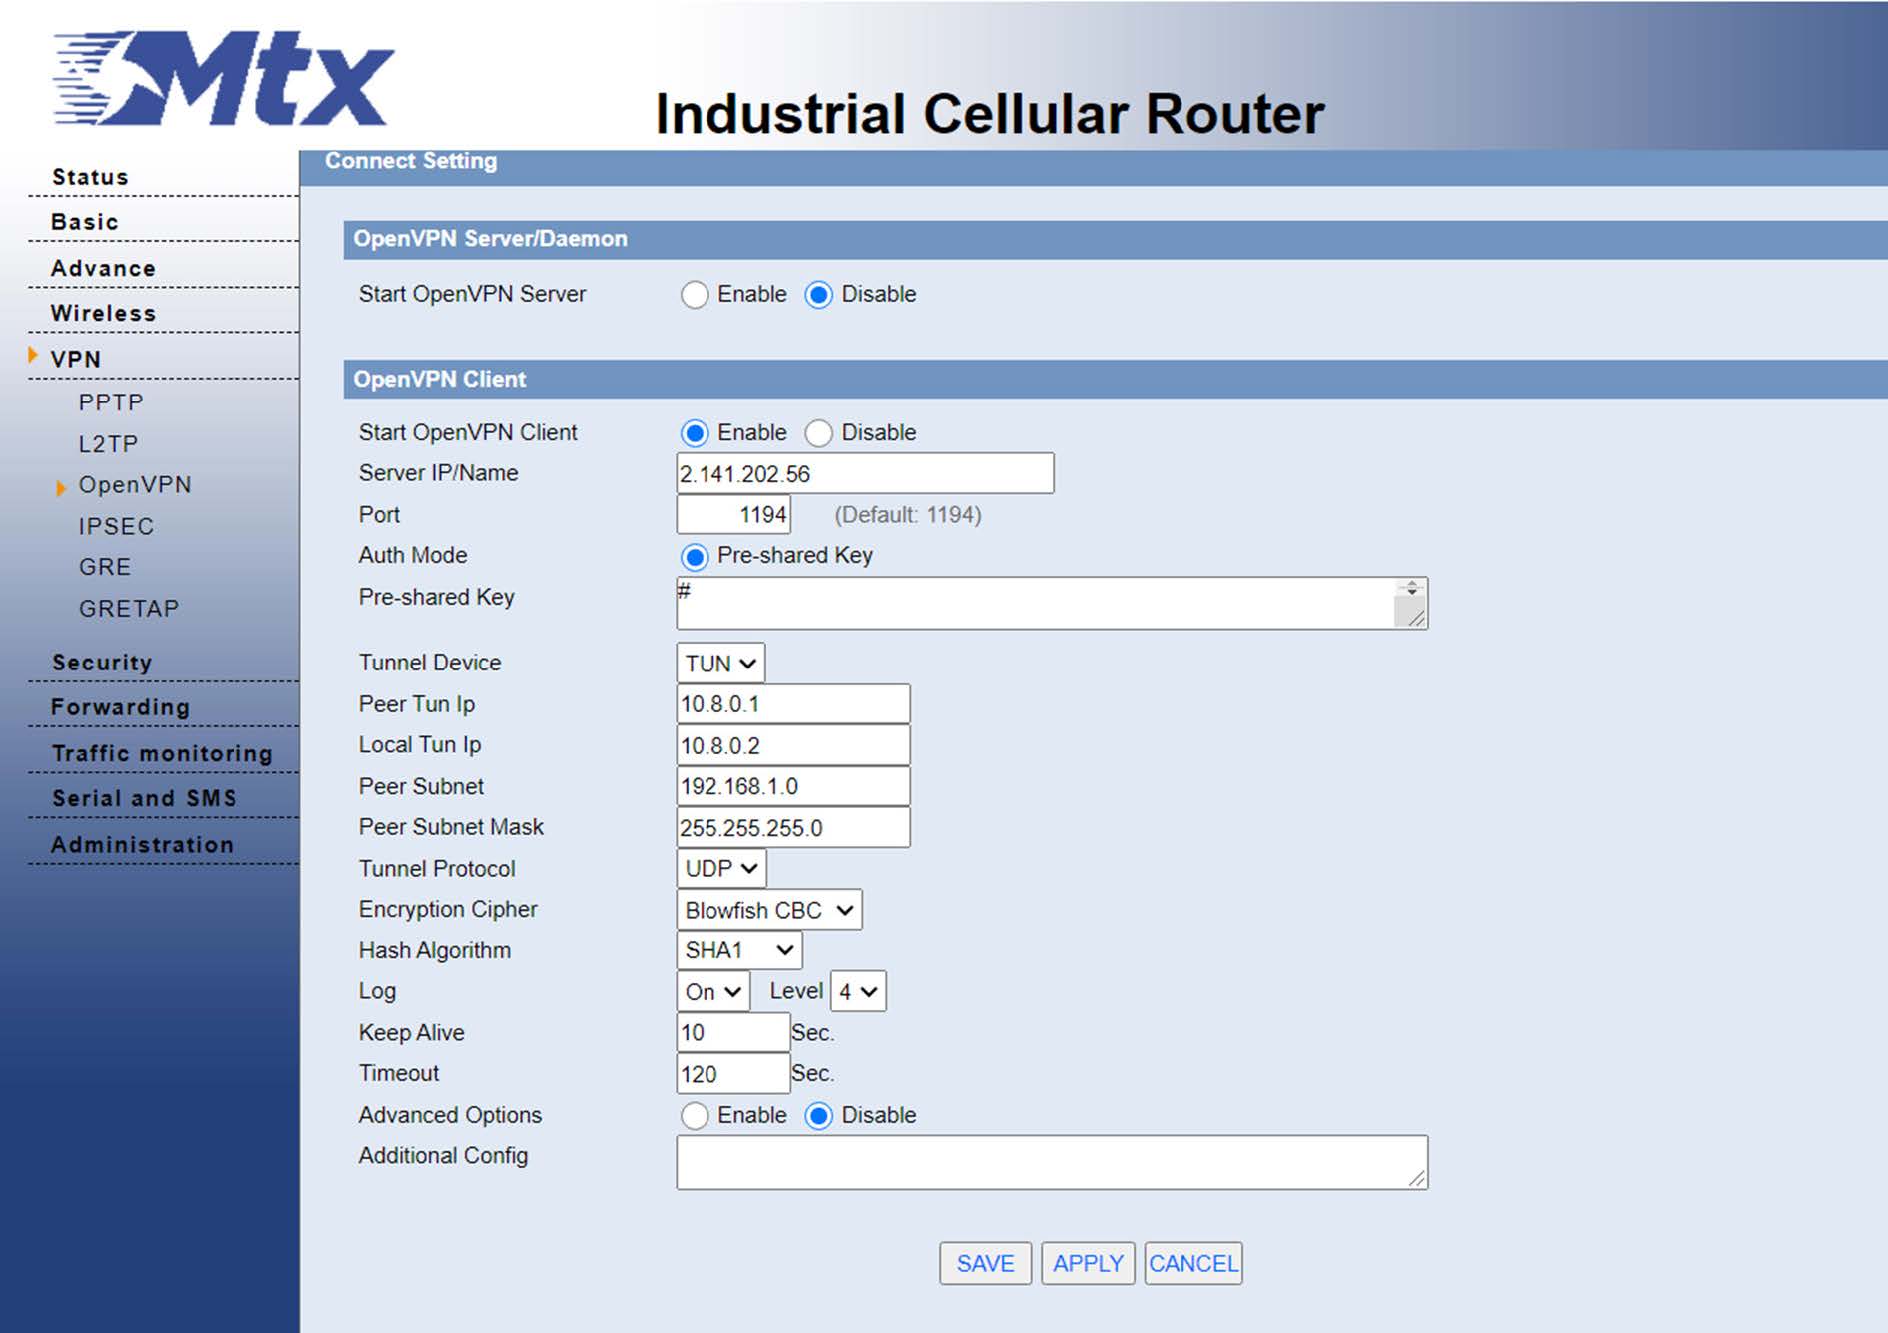
From the VPN-OpenVPN menu, we are going to configure the client options:
- We enable the OpenVPN client.
- We fill in the IP of the OpenVPN server, in our case 2.141.202.56.
- We paste the shared key that we have generated on the server in the Pre-shared Key section.
- In the part of Peer Tun IP, we can the IP that we gave in the server 10.8.0.1.
- In the part of Local Tun Ip, we can configure the IP that we configure on the server as 10.8.0.2.
- In the Peer Subnet part, we have to configure the local subnet of the server, in this case 192.168.1.0/24.
- And finally we will configure the port.
- We will apply the changes and save.
Once this is done, we can verify that the tunnel has been established correctly.
From the server:

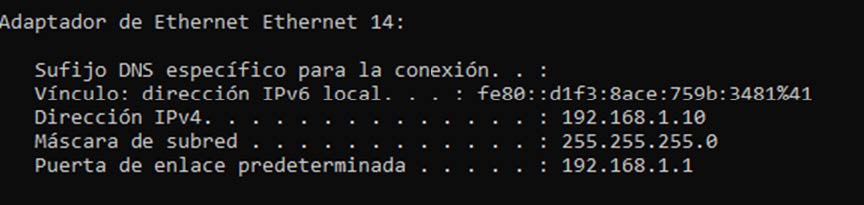
From the client:

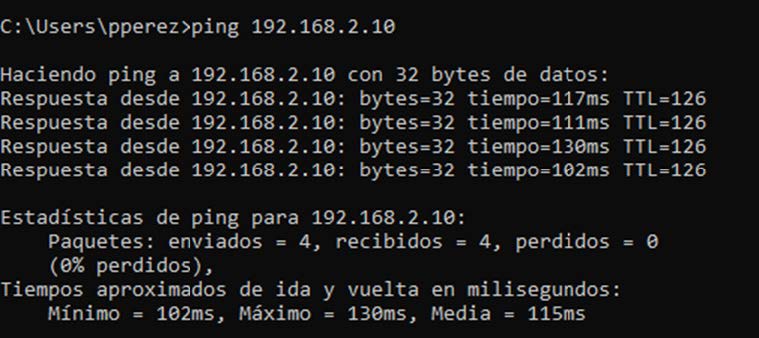
Now we can check that the PCs are seen between by pinging from the computer connected to the server router to the computer connected to the client router:

 Geben Sie den Verbindungsmodus „ethernet“ oder „modem“ ein:
 Stellen Sie bei einer Ethernet-Konfiguration sicher, dass die IP-Parameter mit dem Serverzugriff entsprechend der lokalen Netzwerkkonfiguration des Hubs kompatibel sind. Bei einer Ethernet-Verbindung muss die Konfiguration mit der lokalen Netztopologie des Hubs kompatibel sein, damit dieser auf die Server zugreifen kann. Diese Konfiguration erfolgt über die Konfigurationsseite „Networks“ (siehe Kapitel 3.2.2.3: „Netzwerke (Networks)“).
Bei einer Modemverbindung muss das Modem korrekt konfiguriert sein, bevor eine Verbindung hergestellt werden kann. Diese Konfiguration erfolgt auf der Konfigurationsseite „Modem“ (siehe Kapitel 3.2.2.4: „Modem“).
Die minimal zu konfigurierenden Serverparameter sind folgende:
Stellen Sie bei einer Ethernet-Konfiguration sicher, dass die IP-Parameter mit dem Serverzugriff entsprechend der lokalen Netzwerkkonfiguration des Hubs kompatibel sind. Bei einer Ethernet-Verbindung muss die Konfiguration mit der lokalen Netztopologie des Hubs kompatibel sein, damit dieser auf die Server zugreifen kann. Diese Konfiguration erfolgt über die Konfigurationsseite „Networks“ (siehe Kapitel 3.2.2.3: „Netzwerke (Networks)“).
Bei einer Modemverbindung muss das Modem korrekt konfiguriert sein, bevor eine Verbindung hergestellt werden kann. Diese Konfiguration erfolgt auf der Konfigurationsseite „Modem“ (siehe Kapitel 3.2.2.4: „Modem“).
Die minimal zu konfigurierenden Serverparameter sind folgende:
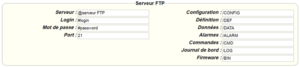
 Diese Felder müssen konfiguriert werden: „Interface“, „Type“, „Server type“, „Address“, „Port“, „Login“ und „Password“.
In den übrigen Feldern können die Standardwerte beibehalten werden, solange die Verzeichnisse zuvor korrekt angelegt wurden. Weitere Einzelheiten siehe Kapitel 3.1.2: „Konfigurationsdateien“.
Diese Felder müssen konfiguriert werden: „Interface“, „Type“, „Server type“, „Address“, „Port“, „Login“ und „Password“.
In den übrigen Feldern können die Standardwerte beibehalten werden, solange die Verzeichnisse zuvor korrekt angelegt wurden. Weitere Einzelheiten siehe Kapitel 3.1.2: „Konfigurationsdateien“.


 Warten Sie. Der Hub startet nach ein paar Augenblicken mit der Werkseinstellung neu.