Suchen Sie etwas anderes?
The WAN section refers to everything related to the 2G/3G route configuration, from the connection status, network configuration parameters and supervision of the connection.
Table of Contents
WAN: Status
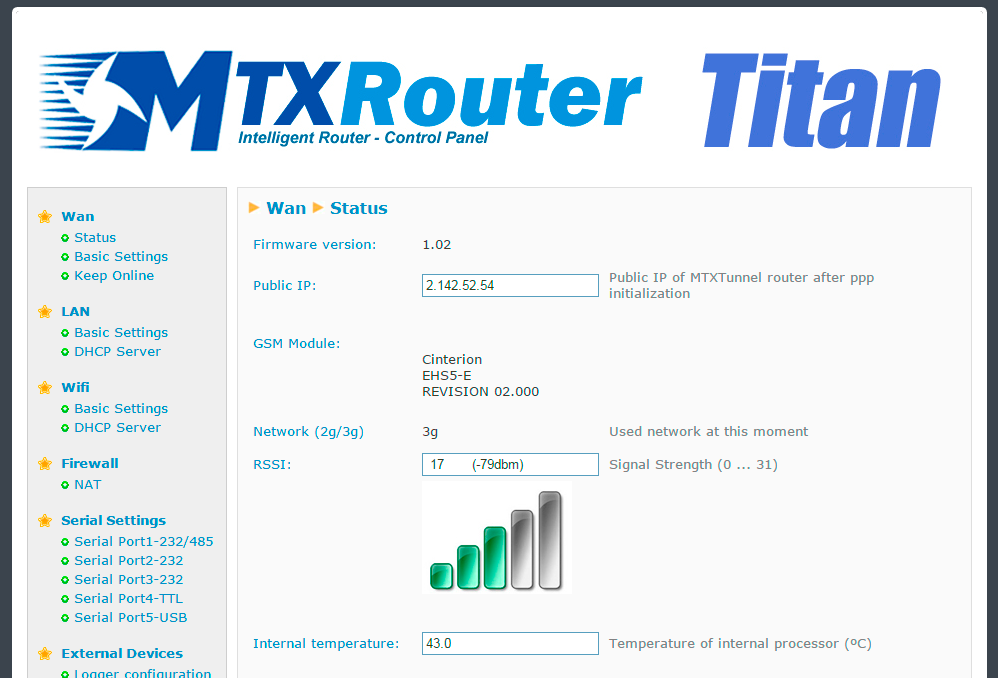
This screen shows the general status of the router:
- Public IP: WAN IP address (address of the GPRS/3G connection) if available
- GSM Module: indicates the manufacturer and the router’s internal GSM module model
- Network (2G/3G): indicates if the current WAN connection is using 2G (GPRS) or 3G
- RSSI: indicates the signal strength. 0=none, 31=maximum
- Internal Temperature: shows the internal processor’s temperature (it does not indicate the outside temperature. To find this out, a Temperature Sensor peripheral device can be connected to the router)
WAN: Basic Settings
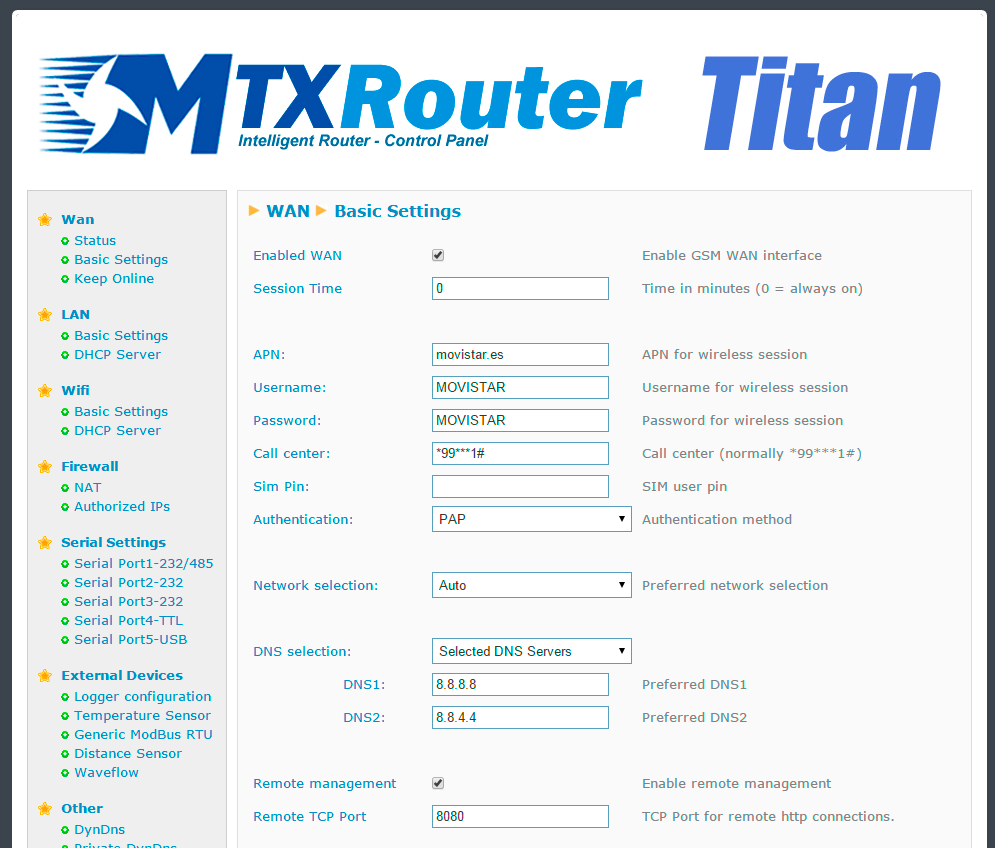
This section assists with the configuration of the WAN (2G/3G) connection parameters. We will need to know certain information about the SIM card such as the APN, login and password. Our network provider should provide we with these.
- Enabled WAN: select this to allow the MTX-Router-Titan to activate the 2G/3G device.
- Session Time: indicates the time in minutes that the 2G/3G connection should be active. If the value is “0”, it means that the connection is active all the time. If a value greater than 0 is specified, the number specifies the number of minutes during which the connection will be active following an event such as an SMS message being received or a missed call. Go to the configuration “Other > SMS Control” to activate and configure these events for when a number greater than 0 is specified.
- APN: operator APN. Consult our GSM provider for this.
- Username: operator Username. Consult our GSM provider for this
- Password: operator Password. Consult our GSM provider for this.
- Call center: call center number. Usually *99***1#
- SIM pin: if our SIM card has a PIN number, it should be specified here.
- Authentication: the method of authentication. Usually PAP
- Network selection:
- auto: the router will use 3G when 3G coverage is available, and 2G in the event that there is no 3G coverage
- 3G: the router will use 3G networks in every case. If there is no 3G coverage, it will not change to 2G
- GPRS: the router will use 2G networks in all cases
- DNS1 and DNS2: DNS servers for domain name resolution. It is recommended that those belonging to Google (8.8.8.8 and 4.4.4.4) are used, or whatever our provider gives we
- Remote management: if activated, we will be able to access the router’s web configuration remotely via the public IP address (indicated in WAN>Status)
- Remote TCP Port: indicates the TCP port for remote configuration. For example, if the value is 8080, the URL of the configuration will be http://x.x.x.x:8080. The standard default port is 80, but if we wish to use NAT to the TCP80 port in an ETH device (IP camera, PLC), we will need to change it, for example, to 8080
ADDITIONAL NOTES
- Once the configuration is finished, click “SAVE CONFIG” to save the changes. Remember that the router should be restarted for the changes to take effect.
WAN: Basic Settings, Utilities
The utilities that we can find at the bottom of the “WAN > Basic Settings” screen allow we to select the main and secondary GSM operators when using a Global SIM card. (A Global SIM card allows we to connect to several network operators that are available. For example, in Spain, we would be able to connect to Movistar, Vodafone or Orange).
- Strong scanning: scans the GSM stations for all available network operators. This action uses a significant amount of processing poour and therefore can take up to 4 minutes. On occasion, it may be necessary to try the process again. If successful, a list of the detected BTS will be shown, indicating the operator’s name, its code, its availability and the type of network (2G/3G). This could be very useful in helping we decide the best operator to use in a particular place.
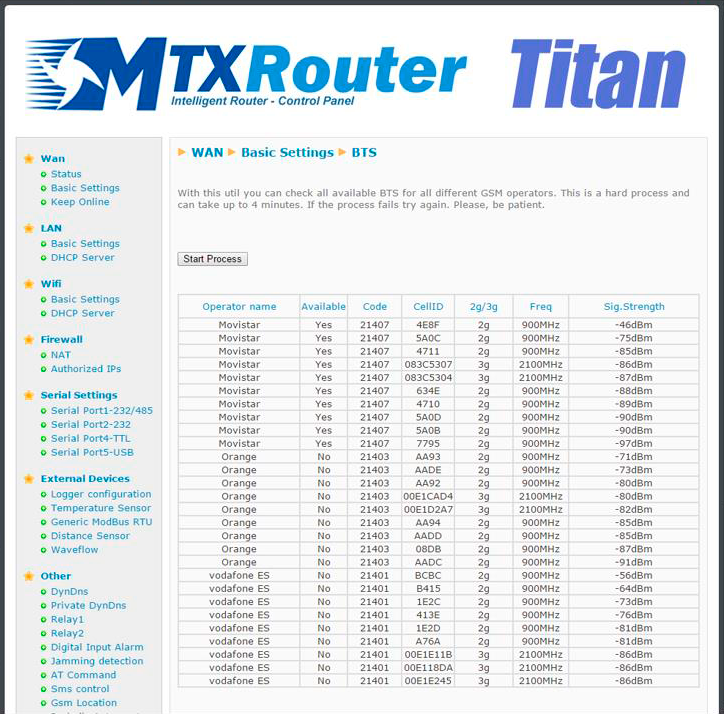
With Strong Scanning, 3G connectivity is lost during the process and therefore we recommend using the Ethernet interface to carry this out. Because of this, “Strong Scanning” has two buttons – “start process from Ethernet” and “Start process from 3G”.
If the process is carried out using Ethernet, press this button and the results will be shown on screen once finished.
If the process is carried out using 3G, press this button and after five minutes, the device will reset itself. We will have to return to the screen manually and press the “See last results” button in order to see the results.
- Light scanning: this carries out a similar process, but only those operators that are available for our SIM card are identified. 3G connectivity is not lost during the process, which could last up to 2 minutes, meaning that it is ideal when carried out remotely via 3G.
- Choose operators: this allows we to choose the GSM operator and the secondary operators. It can only be used when a Global SIM (allowing connections to several operators) is inserted. The default setting is “Automatic”.
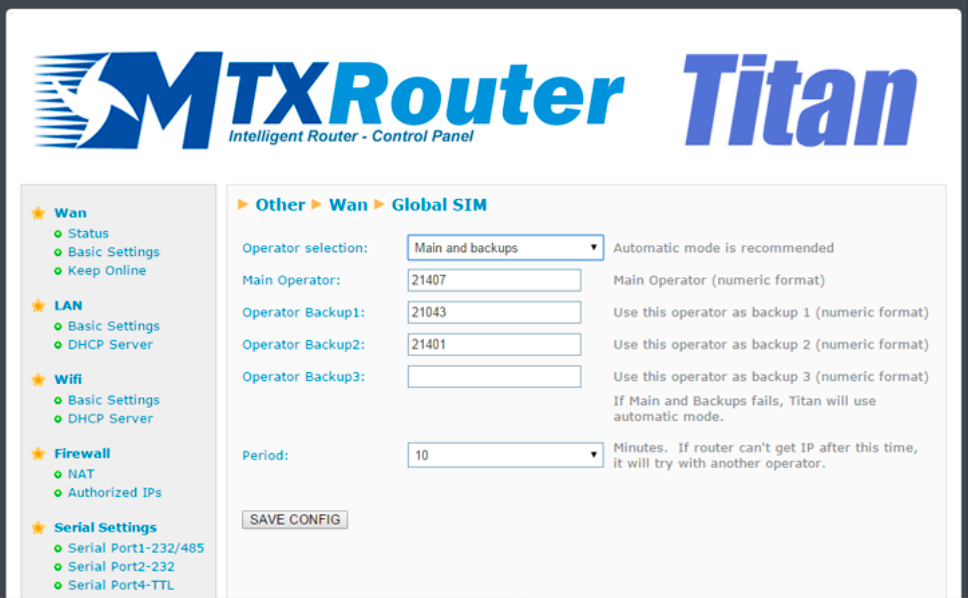
Example contained in the screenshot above. We choose the “Main and Backups” option, which forces the indicated GSM operators to be used. The main operator is 21407 (Movistar). If an IP address is not obtained using this network, the process is retried using operator 21043 (Orange), and if this fails, it tries again with operator 21401 (Vodafone). If the third network operator also fails, the router will try to connect to a GSM network automatically.
If we select the “Automatic” option instead of “Main and Backups”, the router will try to select the operator in the order that is stablished in the SIM card’s internal tables. Except for in locations prone to connectivity problems, we recommend we use the “Automatic” option.
The section Wan > Basic Settings > Utils is not available for 4G models.
- Automatic APN: This new feature will work when we enter the text “auto” in the “APN” field. That is, as indicated in the following figure:
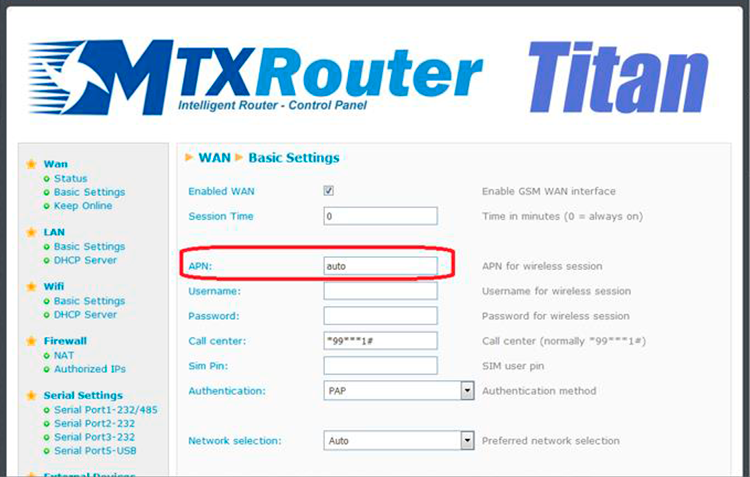
When “auto” is specified in the APN field, the Titan router will not use the APN, Username and Password fields in this section, instead, it will look up in the table (which can be consulted by pressing the “Automatic APN “) The appropriate APN, Username and Passwords. This is particularly useful if we intend to send the router to a third party and only have to insert the SIM without configuring anything else.
Although the list of operators has a considerable number of data (apn, username, password) it is strongly recommended to review the list and update it with the desired operators.
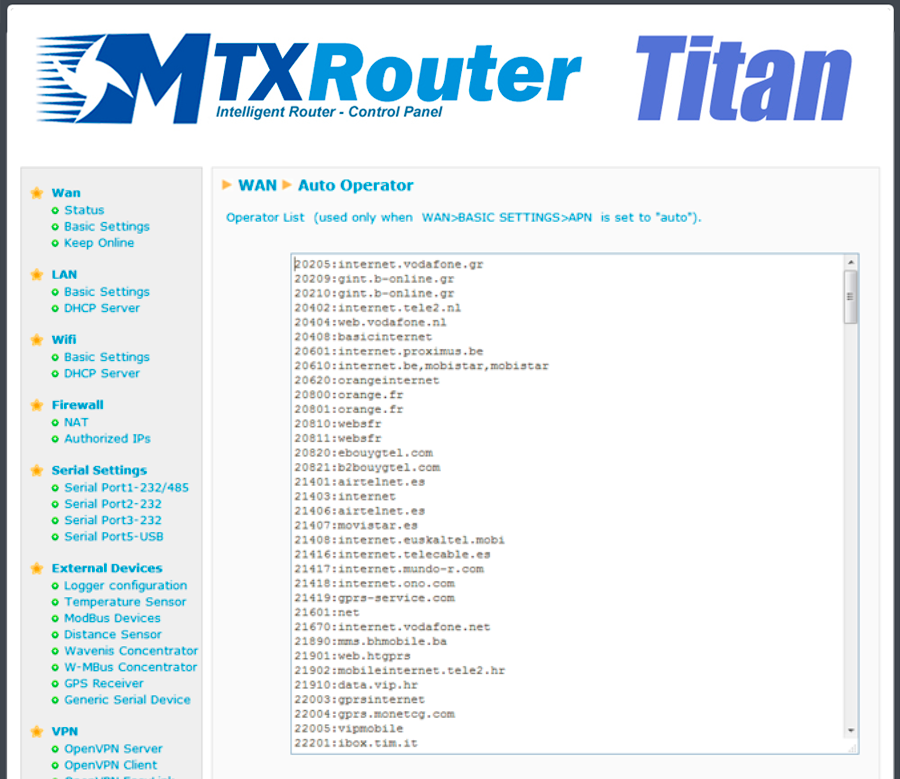
The format of the file is very simple:
codigoSim: apn, username, password
The username and password only need to be indicated in those operators that actually use them, not being necessary otherwise.
Failover: in case we are using the Ethernet interface or the Titan router WiFi as an Internet output and it fails, we can configure this section so the Titan router automatically connects to the Internet via 2G/3G/4G.
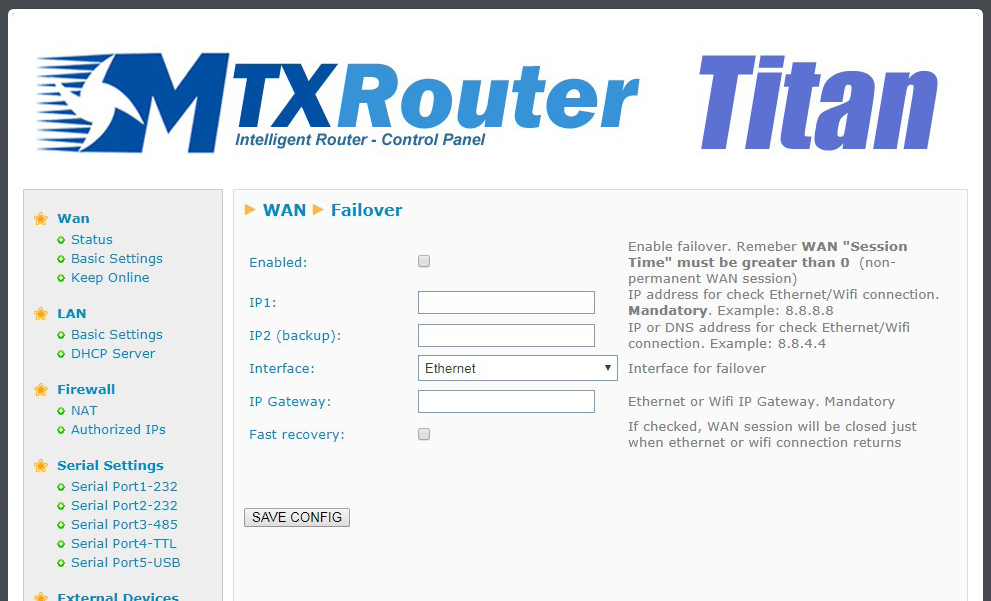
- Enabled: activate this box to enable the Failover
- IP1: IP address for the periodic ping by the used interface (Ethernet or WiFi) to make sure the communications are working
- IP2: backup IP address for the periodic ping by the used interface (Ethernet or WiFi) to make sure the communications are working
- Interface: specify the interface being used to access the Internet (Ethernet or WiFi)
- IP gateway: specify the output gateway IP address used for the Ethernet or WiFi connection
- Fast recovery: select this box in case we want the 2G/3G/4G connection to end when the Ethernet or WiFi connection is restored. Otherwise it will be connected the amount of time specified in WAN > Basic Settings > Session Time
Important: in case we use the Failover feature we need to make sure to enable the box “WAN > Basic Settings > Enabled WAN” and to enter a value > 0 in the field “WAN > Basic Settings > Session Time.” That value will be the minutes the 2G/3G/4G connection will be enabled in case there is a problem with the Ethernet or WiFi interface.
WAN: Keep Online
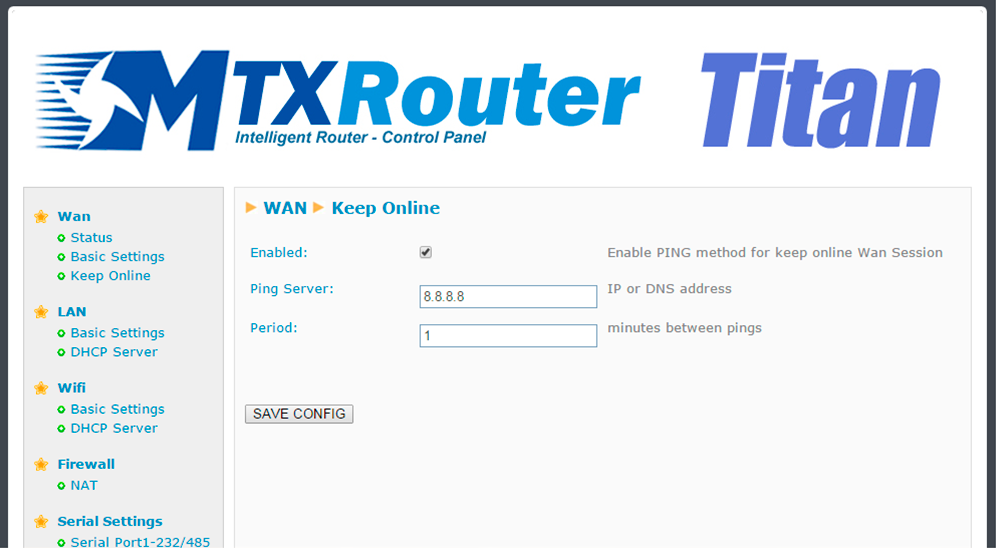
On this screen we can configure a PING to ensure the router’s connectivity. If the PING fails on three occasions, the 2G/3G connection will be reset. We recommend the use of this characteristic.
- Enabled: activate to allow the Titan to periodically send a PING to check the connectivity
- Ping Server: indicates the server’s IP address where the PING should be sent
- Period: indicates how frequently a PING should be sent
Additional Notes
- Once the configuration is finished, click “SAVE CONFIG” to save the changes. Remember that
the router should be restarted for the changes to take effect


 Enter the “ethernet” or “modem” connection type:
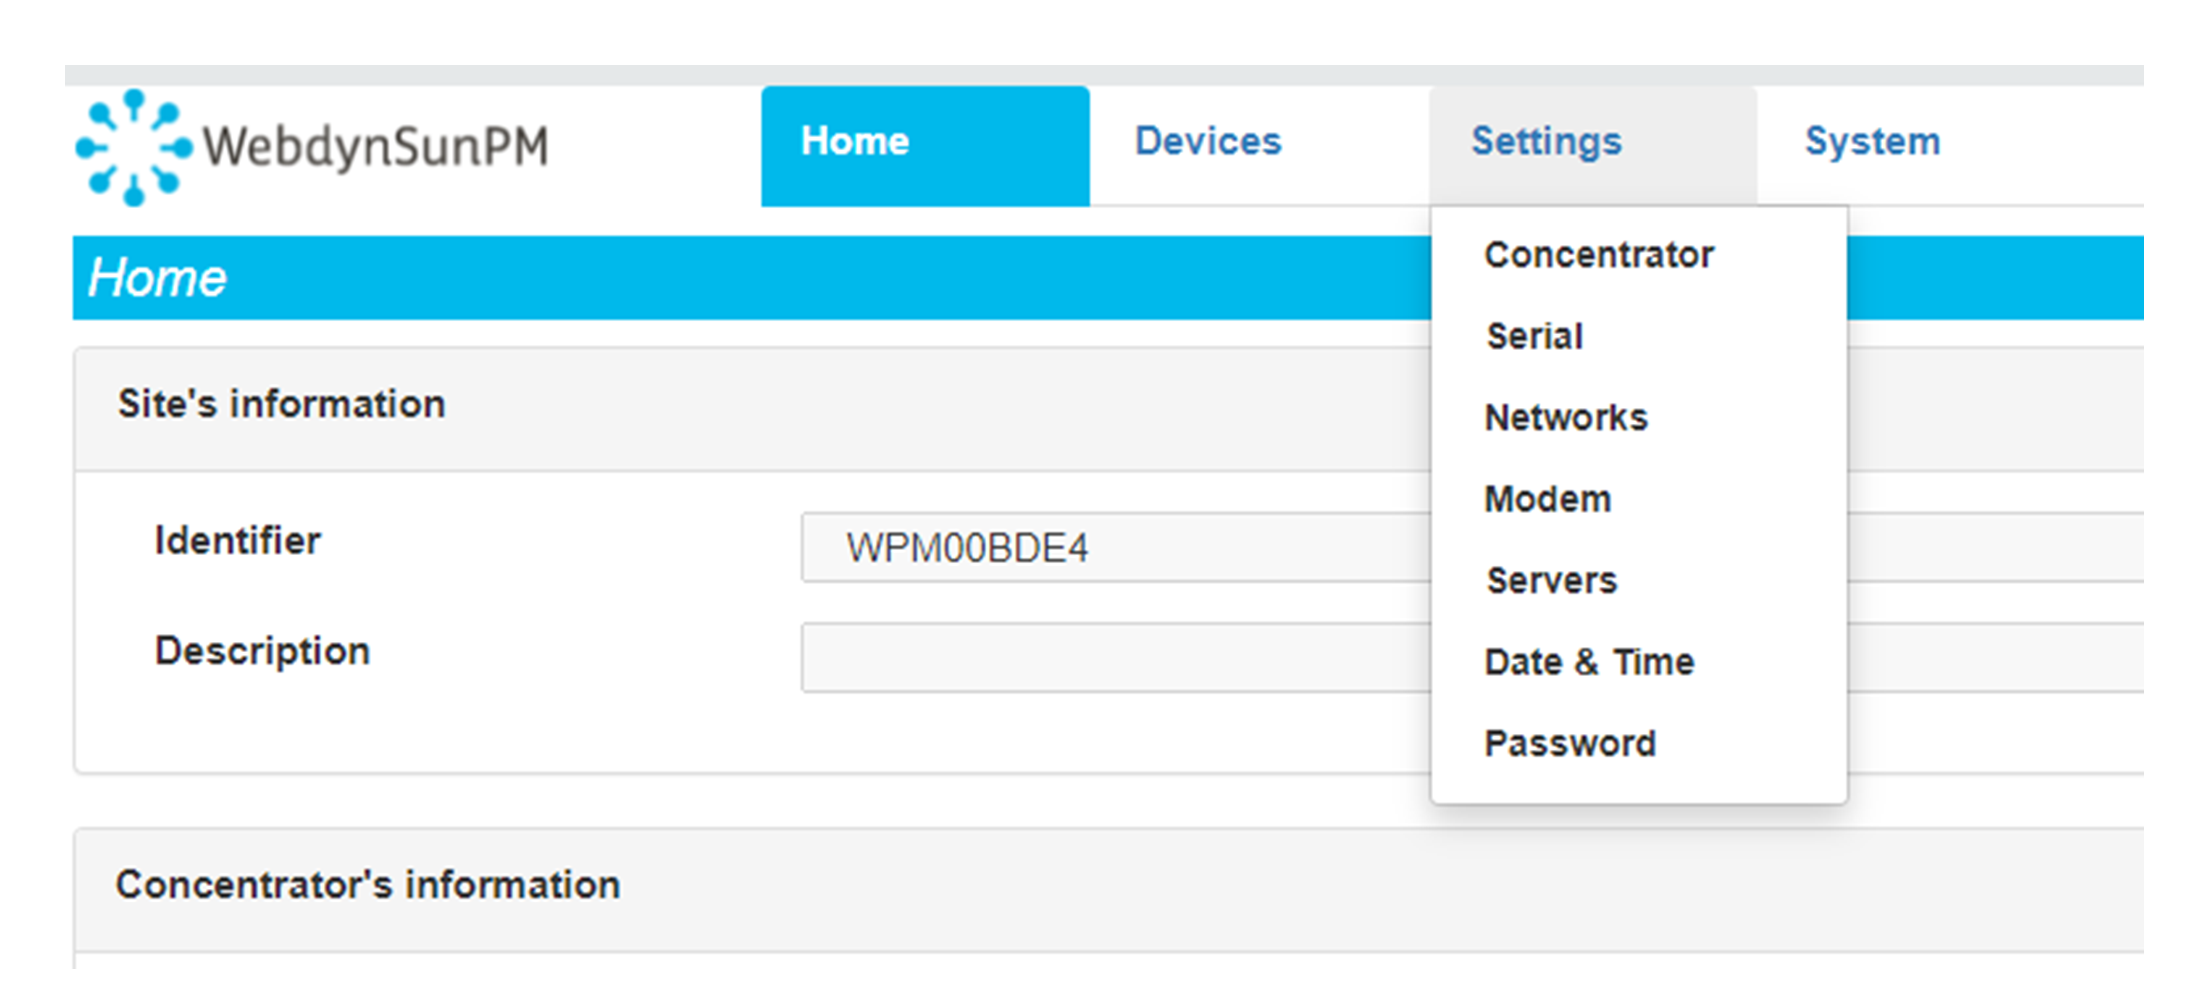
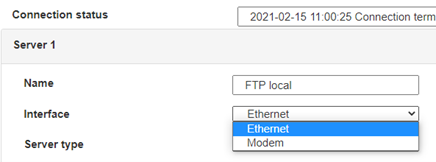 For an ethernet configuration, make sure the IP parameters are compatible with server access according to the concentrator local network configuration. For an ethernet connection, the configuration must be compatible with the concentrator’s local network topology so that it can access the servers. This configuration is done from the “Networks” configuration page (see section 3.2.2.3: “Networks”).
For a modem connection, the modem configuration must be correct before a connection can be set up. This configuration is done from the “Modem” configuration page (see section 3.2.2.4: “Modem”).
The parameters for the servers to be configured are at least the following:
 Therefore the following fields need to be configured: “Interface”, “Type”, “Server type”, “Address”, “Port”, “Login” and “Password”.
The other fields can be left at the default values subject to the directories having been properly created beforehand. See section 3.1.2: “Configuration files” for more details.


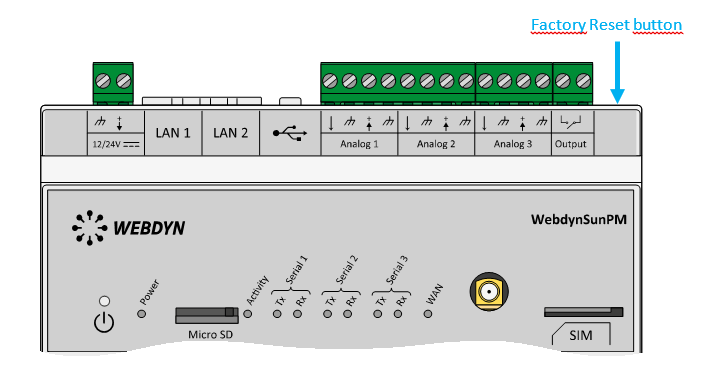 Wait. The concentrator will reboot using its factory configuration.

