Zum Hauptinhalt springen
Suchen Sie etwas anderes?
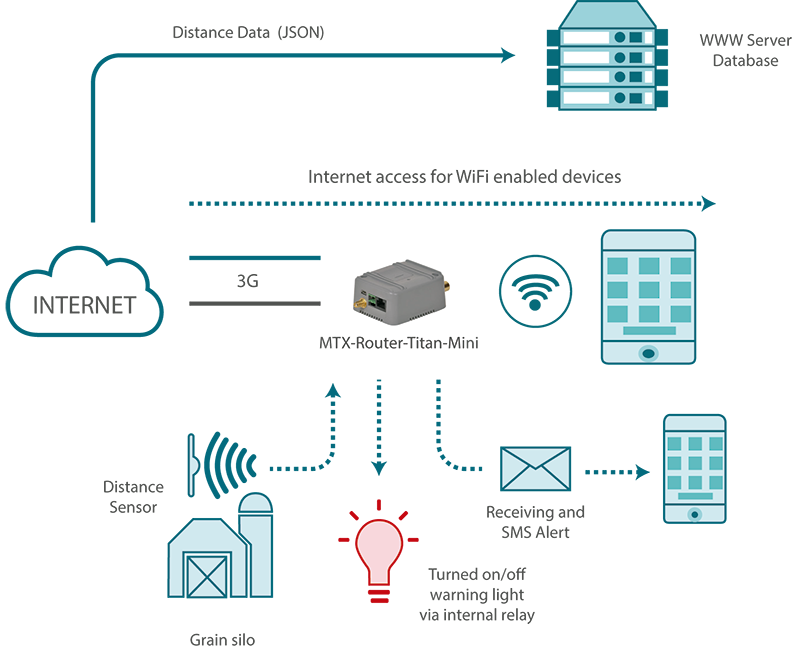
Details of the example scenario:
- We want to control the level of a grain silo for animal feed. For this, the router will have the distance sensor Maxbotix connected to its serial port with an RS232 output. The Maxbotix output will be installed at the top of the grain silo to measure the distance
- When a distance greater than 6m. is detected, the volume is very low and an SMS alert must be sent to three different telephone numbers as well as activating a warning light via a relay
- Additionally, the grain silo level must be sent every 12 hours to a webserver. The web address will be http://www.metering.es/json/set.asp?data=
- The router must provide Internet access to tablets via WiFi to carry out maintenance tasks
Solution: MTX-Router-Titan mini
Configuration example ready for use:
We can easily load the example from the router’s web configuration environment from the menu “Other>Backup / Examples”.
Details:
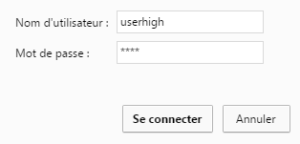
- After the configuration is loaded in our router, we can access the router’s configuration with the default username and password: “admin” and “admin”, and the IP address“192.168.1.2”
- Check the configuration in the menus “Wan>Basic Settings”, “WiFi>Basic Settings”, “WiFi>DHCP Server”, “Serial Settings>Serial Port1”, “External Devices>Logger Configuration”,“External Devices>Distance / Temperatura Sensor”, “Other>Relay1”, “Other>Time Servers”
- If we need a webserver to carry out testing, write to us at iotsupport@mtxm2m.com and request a testing account in the test server site www.metering.es
- Remember that in section 4.5.3 of this manual, we have the exact format of the data (JSON object) that is sent to the webserver

 Geben Sie den Verbindungsmodus „ethernet“ oder „modem“ ein:
 Stellen Sie bei einer Ethernet-Konfiguration sicher, dass die IP-Parameter mit dem Serverzugriff entsprechend der lokalen Netzwerkkonfiguration des Hubs kompatibel sind. Bei einer Ethernet-Verbindung muss die Konfiguration mit der lokalen Netztopologie des Hubs kompatibel sein, damit dieser auf die Server zugreifen kann. Diese Konfiguration erfolgt über die Konfigurationsseite „Networks“ (siehe Kapitel 3.2.2.3: „Netzwerke (Networks)“).
Bei einer Modemverbindung muss das Modem korrekt konfiguriert sein, bevor eine Verbindung hergestellt werden kann. Diese Konfiguration erfolgt auf der Konfigurationsseite „Modem“ (siehe Kapitel 3.2.2.4: „Modem“).
Die minimal zu konfigurierenden Serverparameter sind folgende:
Stellen Sie bei einer Ethernet-Konfiguration sicher, dass die IP-Parameter mit dem Serverzugriff entsprechend der lokalen Netzwerkkonfiguration des Hubs kompatibel sind. Bei einer Ethernet-Verbindung muss die Konfiguration mit der lokalen Netztopologie des Hubs kompatibel sein, damit dieser auf die Server zugreifen kann. Diese Konfiguration erfolgt über die Konfigurationsseite „Networks“ (siehe Kapitel 3.2.2.3: „Netzwerke (Networks)“).
Bei einer Modemverbindung muss das Modem korrekt konfiguriert sein, bevor eine Verbindung hergestellt werden kann. Diese Konfiguration erfolgt auf der Konfigurationsseite „Modem“ (siehe Kapitel 3.2.2.4: „Modem“).
Die minimal zu konfigurierenden Serverparameter sind folgende:
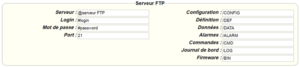
 Diese Felder müssen konfiguriert werden: „Interface“, „Type“, „Server type“, „Address“, „Port“, „Login“ und „Password“.
In den übrigen Feldern können die Standardwerte beibehalten werden, solange die Verzeichnisse zuvor korrekt angelegt wurden. Weitere Einzelheiten siehe Kapitel 3.1.2: „Konfigurationsdateien“.
Diese Felder müssen konfiguriert werden: „Interface“, „Type“, „Server type“, „Address“, „Port“, „Login“ und „Password“.
In den übrigen Feldern können die Standardwerte beibehalten werden, solange die Verzeichnisse zuvor korrekt angelegt wurden. Weitere Einzelheiten siehe Kapitel 3.1.2: „Konfigurationsdateien“.


 Warten Sie. Der Hub startet nach ein paar Augenblicken mit der Werkseinstellung neu.