Zum Hauptinhalt springen
Suchen Sie etwas anderes?
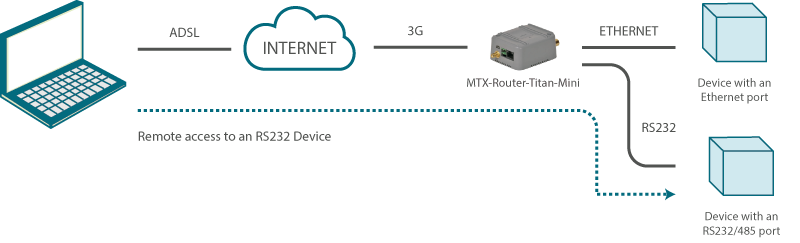
Details of the example scenario:
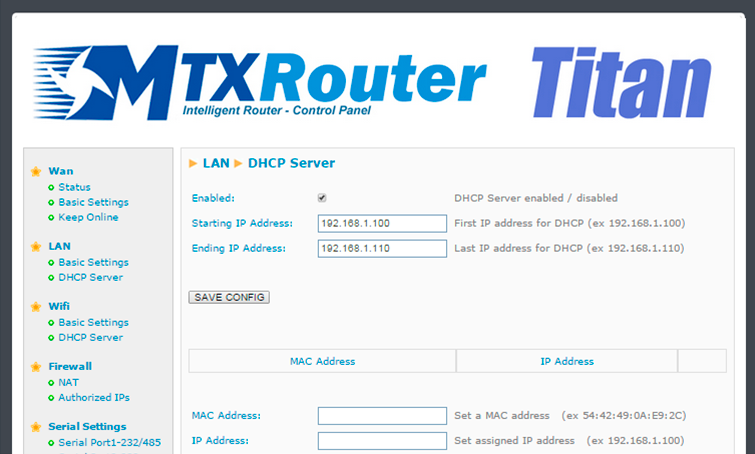
- We have a device with an Ethernet port which we want to provide with Internet access to send data to the Cloud. The device does not have a fixed LAN IP address, therefore we want to use DHCP in the Ethernet port
- We need to be able to access the router’s configuration remotely via the standard TCP port 80
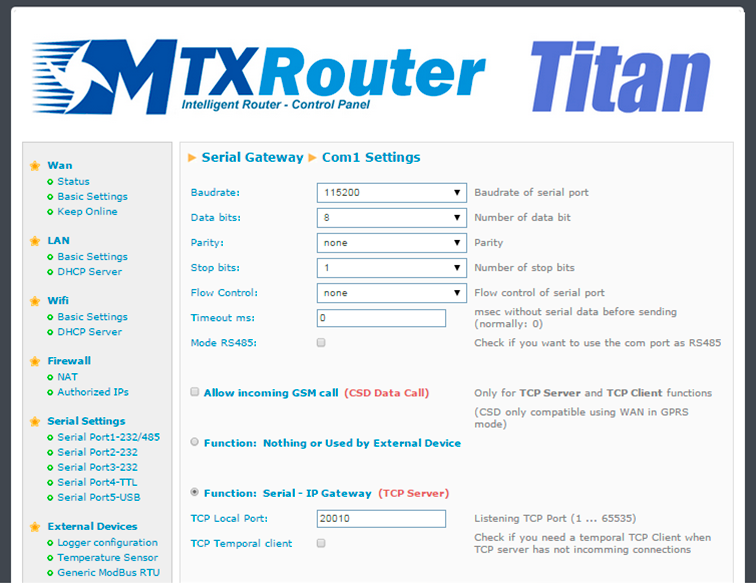
- The router will be listening in the TCP port 20010 to create a transparent 3G-RS232 gateway and to be able to remotely access the device via the serial port RS232 with the configuration
115200,8,N,1
Solution: MTX-Router-Titan mini
Configuration example ready for use:
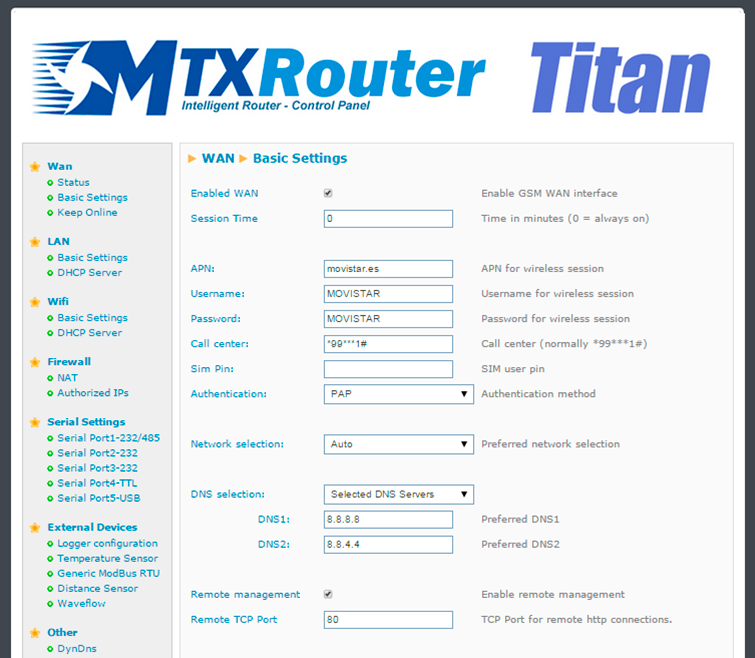
We can easily load the example from the router’s web configuration environment from the menu “Other>Backup/Examples”.
Details:
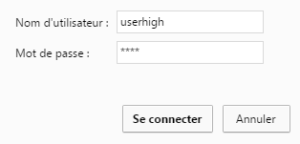
- After the configuration is loaded in our router, we can access the router’s configuration with the default username and password: “admin” and “admin”, and the IP address“192.168.1.2”
- Check the configuration in the menus “Wan>Basic Settings”, “LAN>DHCP”, “Serial Settings>Serial Port 1”
- With the 3G-RS232 gateway, everything that is sent to the router’s TCP port 20010 will be redirected to the device’s serial port RS232 and vice versa

 Geben Sie den Verbindungsmodus „ethernet“ oder „modem“ ein:
 Stellen Sie bei einer Ethernet-Konfiguration sicher, dass die IP-Parameter mit dem Serverzugriff entsprechend der lokalen Netzwerkkonfiguration des Hubs kompatibel sind. Bei einer Ethernet-Verbindung muss die Konfiguration mit der lokalen Netztopologie des Hubs kompatibel sein, damit dieser auf die Server zugreifen kann. Diese Konfiguration erfolgt über die Konfigurationsseite „Networks“ (siehe Kapitel 3.2.2.3: „Netzwerke (Networks)“).
Bei einer Modemverbindung muss das Modem korrekt konfiguriert sein, bevor eine Verbindung hergestellt werden kann. Diese Konfiguration erfolgt auf der Konfigurationsseite „Modem“ (siehe Kapitel 3.2.2.4: „Modem“).
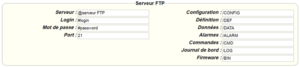
Die minimal zu konfigurierenden Serverparameter sind folgende:
Stellen Sie bei einer Ethernet-Konfiguration sicher, dass die IP-Parameter mit dem Serverzugriff entsprechend der lokalen Netzwerkkonfiguration des Hubs kompatibel sind. Bei einer Ethernet-Verbindung muss die Konfiguration mit der lokalen Netztopologie des Hubs kompatibel sein, damit dieser auf die Server zugreifen kann. Diese Konfiguration erfolgt über die Konfigurationsseite „Networks“ (siehe Kapitel 3.2.2.3: „Netzwerke (Networks)“).
Bei einer Modemverbindung muss das Modem korrekt konfiguriert sein, bevor eine Verbindung hergestellt werden kann. Diese Konfiguration erfolgt auf der Konfigurationsseite „Modem“ (siehe Kapitel 3.2.2.4: „Modem“).
Die minimal zu konfigurierenden Serverparameter sind folgende:
 Diese Felder müssen konfiguriert werden: „Interface“, „Type“, „Server type“, „Address“, „Port“, „Login“ und „Password“.
In den übrigen Feldern können die Standardwerte beibehalten werden, solange die Verzeichnisse zuvor korrekt angelegt wurden. Weitere Einzelheiten siehe Kapitel 3.1.2: „Konfigurationsdateien“.
Diese Felder müssen konfiguriert werden: „Interface“, „Type“, „Server type“, „Address“, „Port“, „Login“ und „Password“.
In den übrigen Feldern können die Standardwerte beibehalten werden, solange die Verzeichnisse zuvor korrekt angelegt wurden. Weitere Einzelheiten siehe Kapitel 3.1.2: „Konfigurationsdateien“.


 Warten Sie. Der Hub startet nach ein paar Augenblicken mit der Werkseinstellung neu.